Campaigns is a tool that allows you to organise content playback placement and the timing of your Contents, Messages, Files or even your files in your Folders.
How to create campaigns
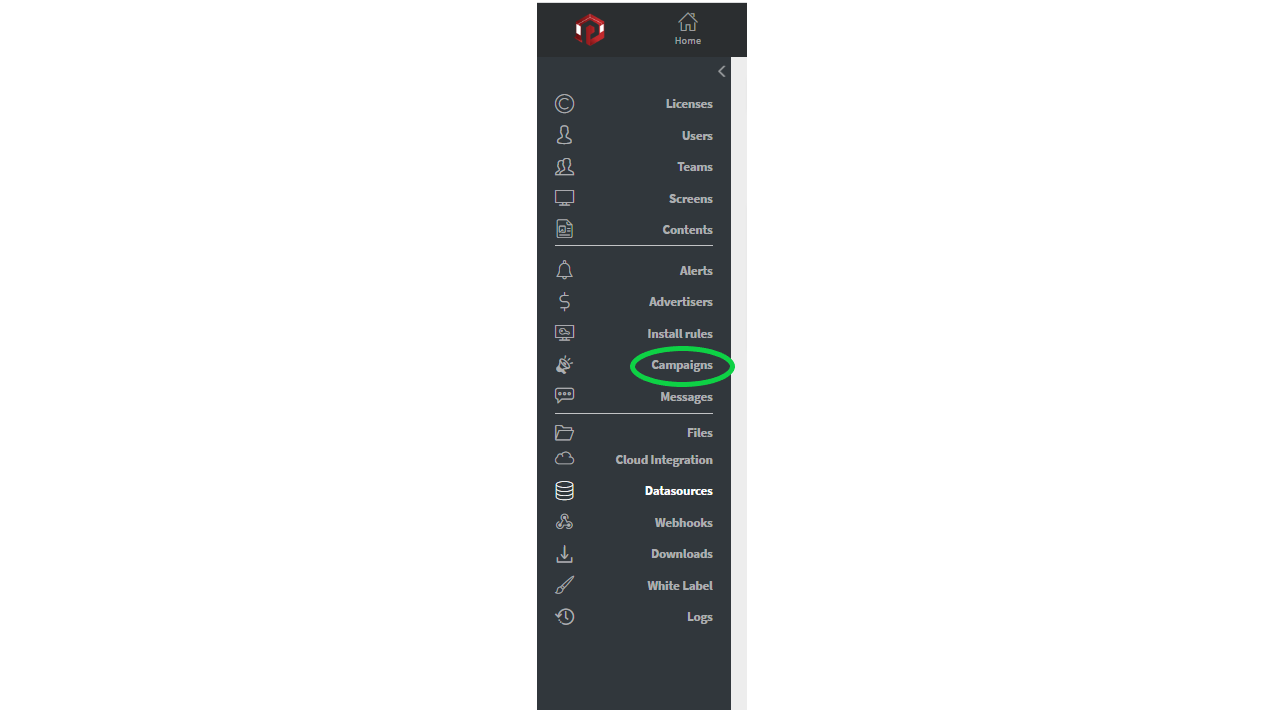
Navigate to the Settings menu and then select Campaigns.

The Add new campaign modal has 4 parts:
- Basic information
- What to play?
- Where to play?
- When to play?
Basic information
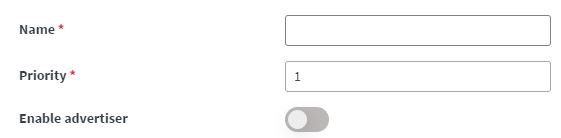
Basic information includes the following fields:
- Name: the name of the campaign
- Priority: helps with the ordering of the Campaign if there are multiple campaigns
- Enable advertiser: enables Campaign to report to Advertiser’s Proof of Play statistics
Ordering multiple Campaigns
Campaigns will be played in Priority order: 1 first, then 2 etc. If multiple campaigns have the same priority (e.g 1) then those campaigns will be played in alphabetical order.
This ordering will be relevant later when we discuss the Campaign playlist.
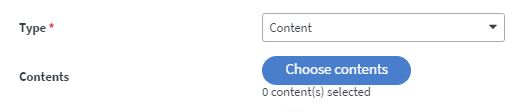
What to play?
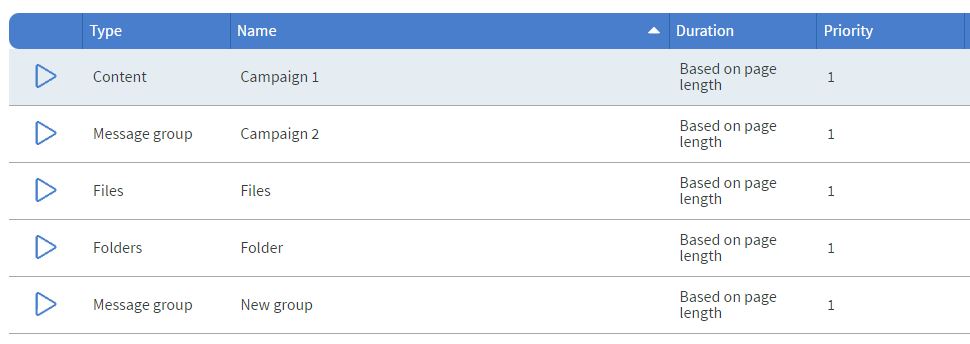
The Type field has several options you can choose from:
- Content
- Content by tag
- Message group
- Files
- Folders
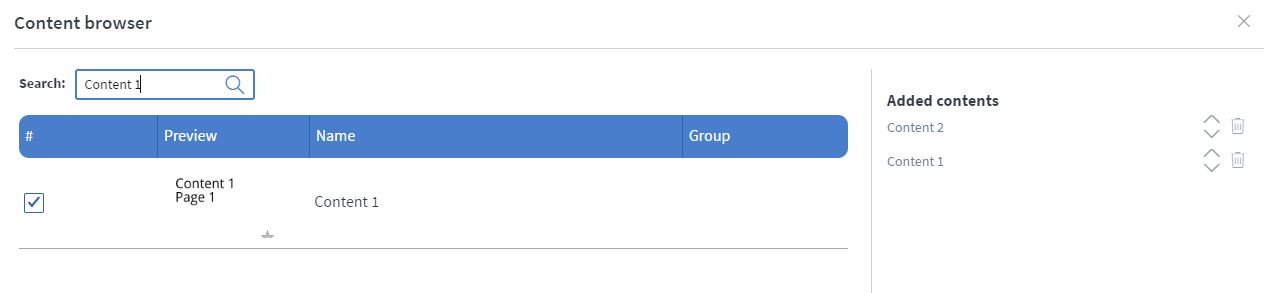
You can choose between two options if you want to use Contents in your campaign:
Content
This option allows you to choose the contents that you have previously made.
This option allows you to order your content with the Content browser modal.
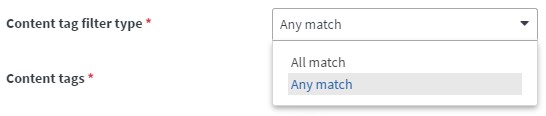
Content by tag
Contents can also be chosen by tags. You can add tags to your content on the Home Screen.

For more options, you can filter the tags with the Content tag filter type to match All or Any of the chosen tags.
Message group
You can choose Message group instead of Contents. This will take your chosen message groups into your campaign. See more about Messages and message groups: Messages Menu

Files
If you choose the Files option, you can select the files you want to play in your Campaign from the file selector.
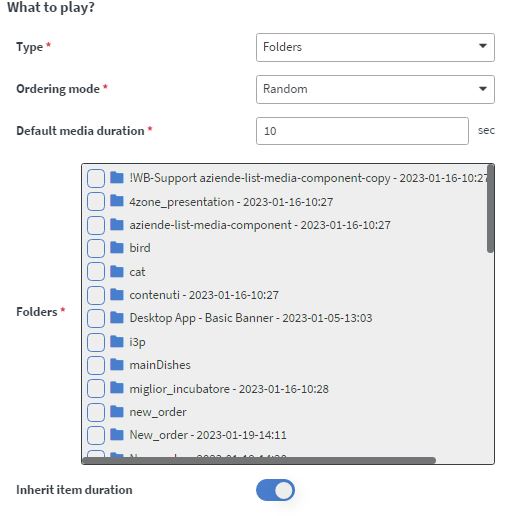
You will also see a box named Default media duration, where you can set the duration of your media items that don’t have a duration of their own e.g. images.

Inherit item duration means that the files will be played as they are. For example, if you choose a video with 4-sec playtime and an image with a Default media duration of 10 sec from the file selector. Inherit item duration will play the video for 4 seconds and the image for 10 seconds.
If you switch off the Inherit item duration you will see another box named Maximum item duration. This will maximize how long items will be able to play for.

Please note that, the shorter duration between ‘Maximized item duration’ and ‘Default media duration’ will always be applied.
Take the previous example: you choose a video with 4-sec playtime, and an image with a Default media duration of 10-sec from the file selector and set the Maximum item duration to 5-sec.
This means the video will be played for only 4-sec, and WILL NOT be restarted to fill out the full 5-sec. Similarly, the 10-sec image will be cut down to 5 sec.
Folders
The Folders option is similar to Files, but you have to choose folders instead of files.
With the Ordering mode box, you can switch between random and alphabetical.
Where to play?
The Where to play option determines which Screens the campaign will apply to.
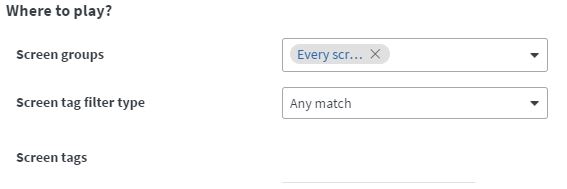
Please note that there is an AND logical connection between the “Screen groups” and “Screen tag” filter. This means that the tag filter will only look for screens that are in the selected Screen groups.
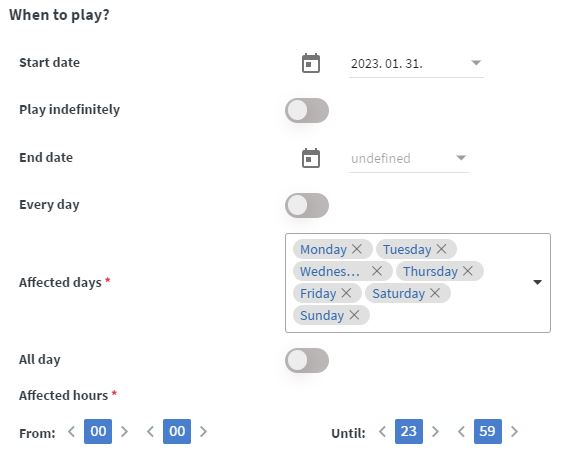
When to play?
Campaigns can be set up to play at certain times. The basic setup only requires a starting date.
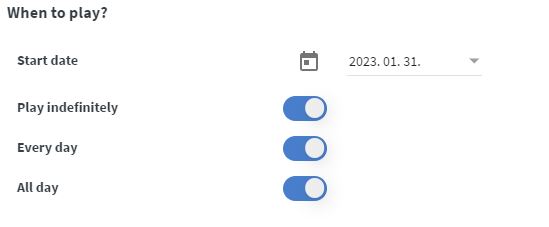
You can also customise this setup with:
- Play indefinitely (End date selector)
- Every day (day selector for affected days)
- All day (hour selector for affected hours)
Assign Campaigns to devices
First, you need to add a Contents widget within your content.

Then you have to enable Campaign mode on the widget.
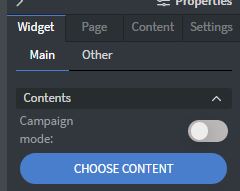
Now you can assign your content to your device and the Campaign is ready to use.
Please note that Campaigns do not have master/overlay pages and can not use navigations, interactions or animations.
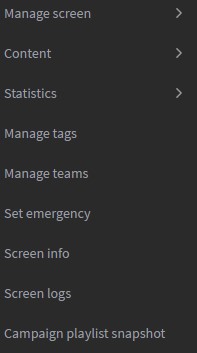
Campaign playlist snapshot
After you assign your content containing the Contents widget with Campaign mode enabled, you can see your campaign playout on your device.
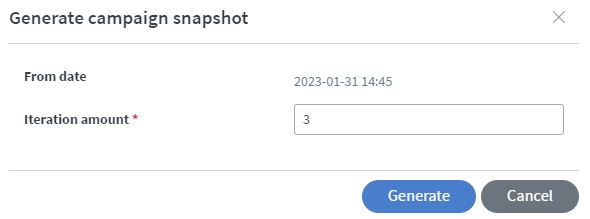
You can download the Campaign playlist snapshot from the right-click context menu of a screen.
This will generate a PDF file from the given From date with the given Iteration amount.
An iteration in the context of the campaign playlist means the following:
- In each iteration, only exactly one media from each campaign is played (one page from the contents, one message from the group, one file, one file from a folder etc)
- It doesn’t matter if more than one bundle is pulled in (e.g if there are multiple contents in one campaign). It doesn’t matter if the campaign is longer than the media, it just switches when it’s done. If the length of the campaign is less than the media, it will cut the media to the campaign runtime
- The order of the campaigns will be determined by the Priority setup in Settings > Campaigns and if multiple campaigns have the same priority, they will be ordered alphabetically.
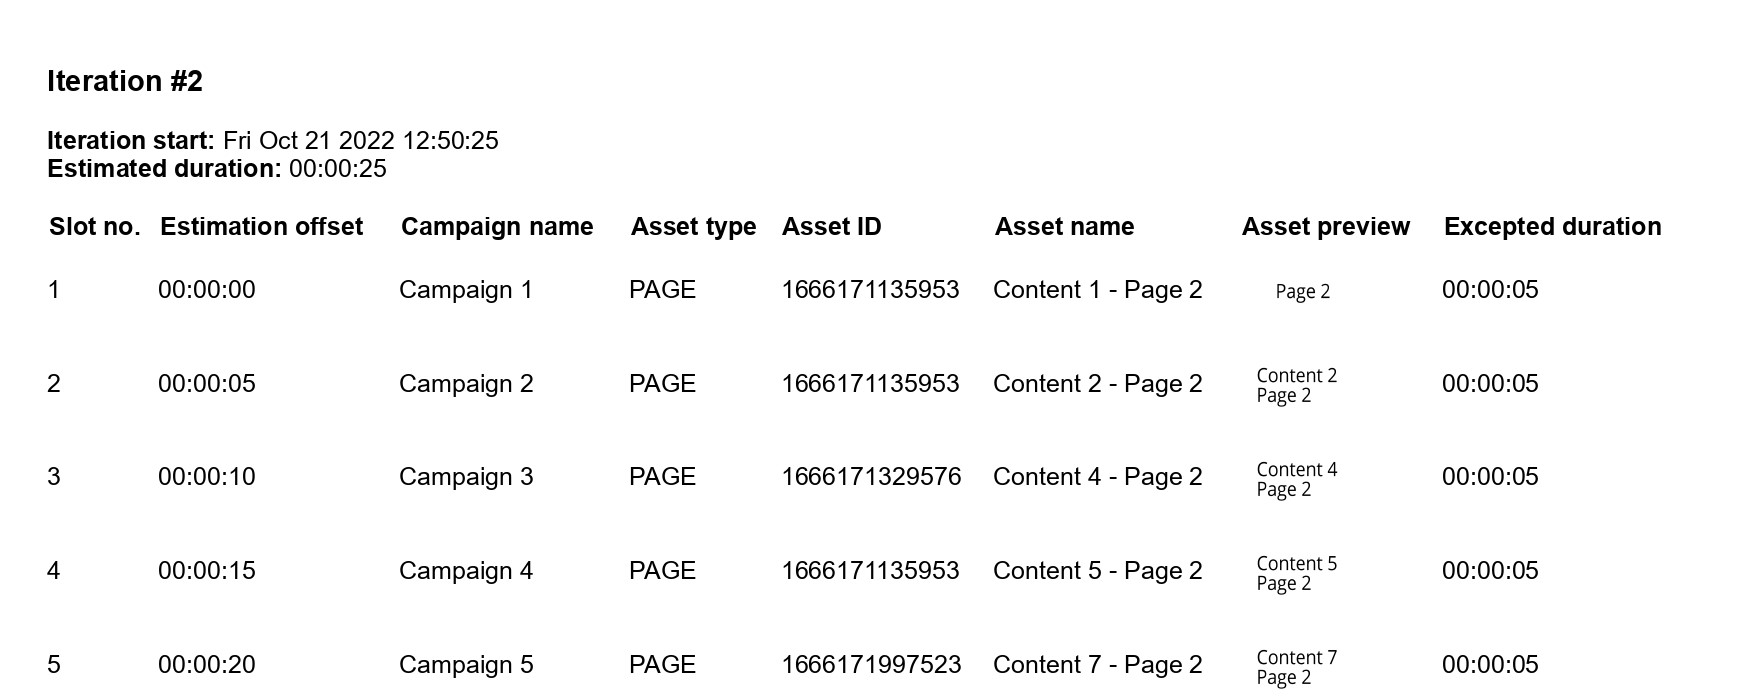
Here is an example of a complex campaign system, and its snapshot
All day every day:
- Campaign 1: Content 1 (has 3 pages)
- Campaign 2: Content 2 (has 2 pages), Content 3 (has 3 pages)
12:00 – 23:59 every day:
- Campaign 3: Content 4 (has 2 pages)
12:00 – 23:59 on weekdays:
- Campaign 4: Content 5 (has 3 pages), Content 6 (has 1 page)
00:00 – 12:59 on Monday, Wednesday, and Friday:
- Campaign 5: Content 7 (has 2 pages)
For ease of understanding, every page of the contents is 5 seconds long.
If you download the Campaign snapshot on Friday, with a From date of 12:50 and an iteration amount set to 3, you will get the following.
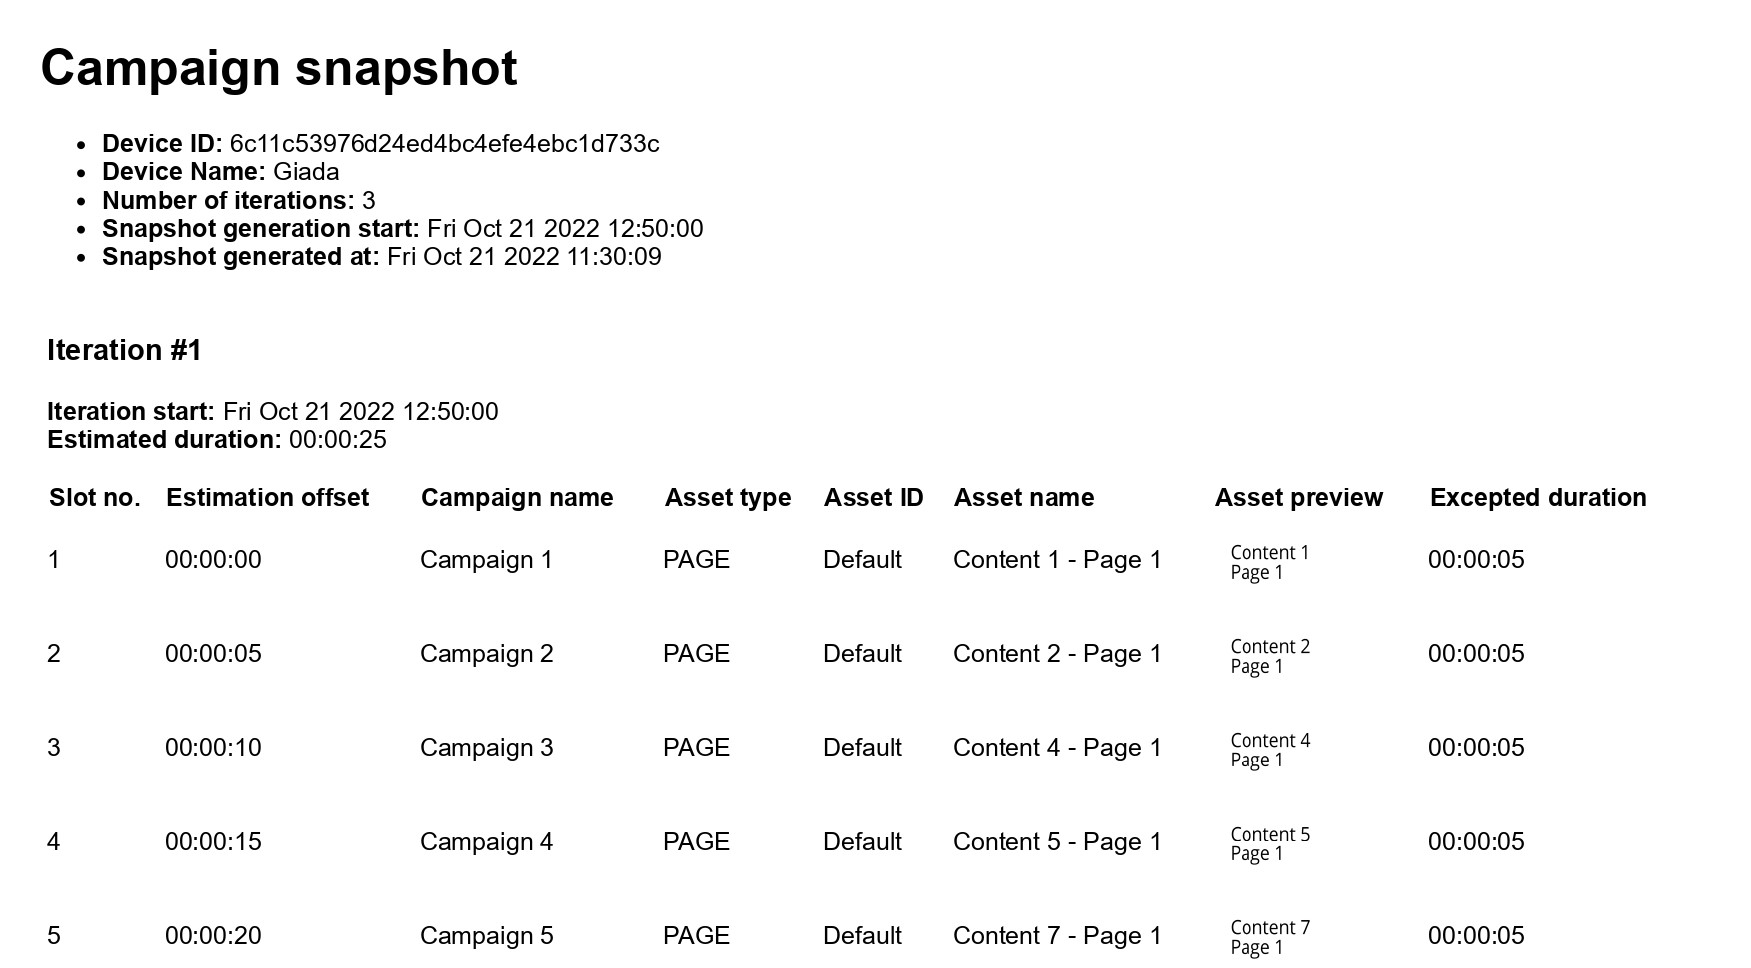
Why Iteration #1 looks like this
All day every day
- Campaign 1 – Content 1 – Page 1
- Campaign 2 – Content 2 – Page 1 (we have Content 3 in this same campaign, but remember only 1 media per campaign is allowed in one iteration)
12:00 – 23:59 every day (12:50 is in this time interval)
- Campaign 3 – Content 4 – Page 1
12:00 – 23:59 on Weekdays (12:50 is in this time interval, and because of weekdays Friday is included)
- Campaign 4 – Content 5 – Page 1 (we have Content 6 in this same campaign, but remember only 1 media per campaign is allowed in one iteration)
00:00 – 12:59 on Monday, Wednesday, and Friday (12:50 is in this time interval, and Friday is included)
- Campaign 5 – Content 7 – Page 1
The Following 2 Iterations